Enable Two-Factor Authentication for Client Area
Introduction
Security. What a thing this has become, hasn’t it? Did you know you can secure your billing and support account so that the only way to access it is by holding your mobile device in your hand? This type of secondary authentication method is known as two-factor authentication. Two-factor authentication (2FA) is something we offer so there’s that extra layer of security between your data and someone whom you might not want to have access to it. I’ll lay out a quick how-to so that you can enable 2FA for your billing and support (Client Center) account.
Prerequisits
In order to enable 2-factor authentication in cPanel, you’ll need just a few things:
- A smart phone with a time-based one-time password (TOTP) app. We recommend the following:
- Android: Authy, or Google Authenticator
- iOS: Duo Mobile
- Windows Phone: Authenticator
- Access to your Client Area account
Enable Two-Factor Authentication
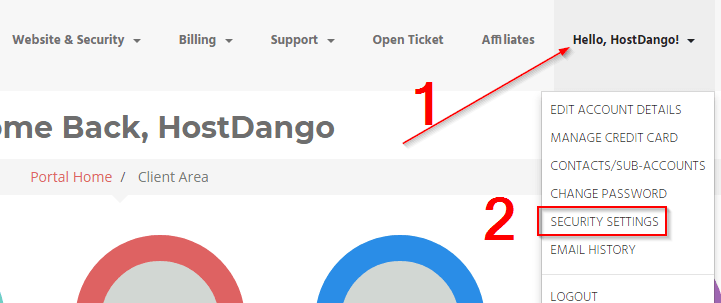
First off, log into the Client Area. Click your name in the upper-right corner and select “SECURITY”:
Next, simply click “Click here to Enable”:
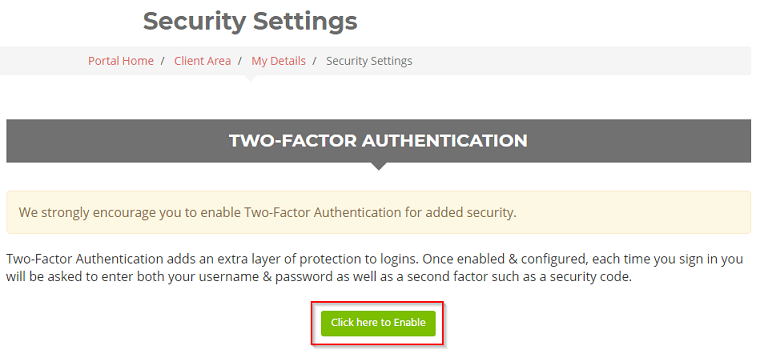
Two-Factor Authentication adds an extra layer of protection to logins. Once enabled & configured, each time you sign in you will be asked to enter both your username & password as well as a second factor such as a security code. Click “Get Started”.
On Your Mobile Device
This is where you’ll need your mobile device. Much like our post about enabling 2FA for your cPanel account, we’re going to use “Authy” for this setup. Authy is a multi-platform application that works well for storing different 2FA keys. In Authy, to add an account, click the three dots menu link in the upper-right corner, and select ‘Add Account’. Once you’re on that screen, tap on ‘SCAN QR CODE‘: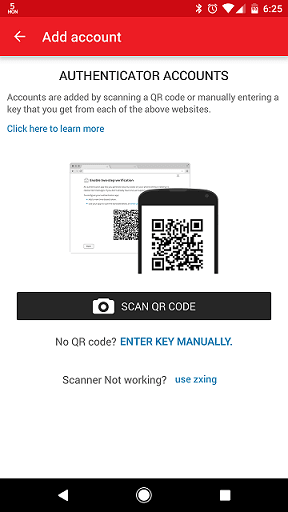
Simply aim your phone’s camera at your computer monitor and Authy will automatically capture the QR code.
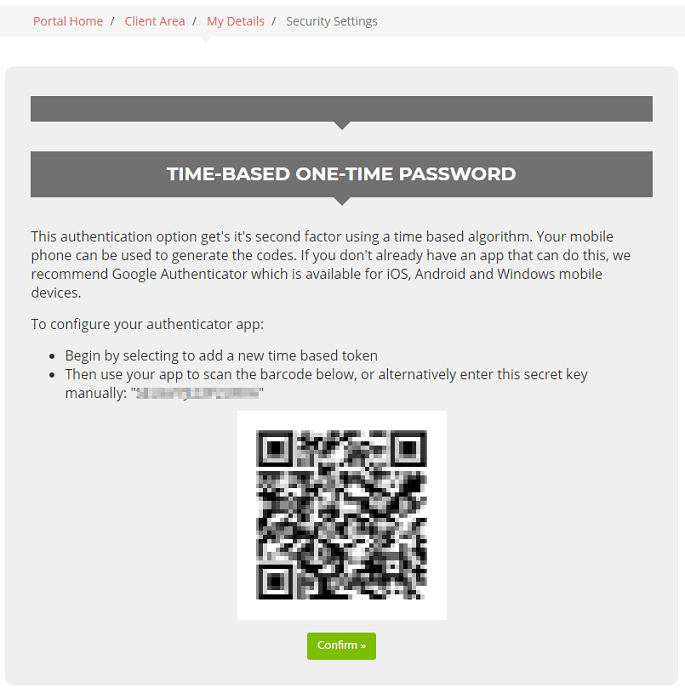
At this point, you will want to name the account (and change the “key” icon, if you wish to customize the icon by color, or other logo) something that will be easy to identify in the future. Once you have named the account, click ‘DONE’.
Important
Make note of the six-digit code. Enter that code into the ‘Verification Step’ box, as seen below, in the setup page to actually enable two-factor authentication.
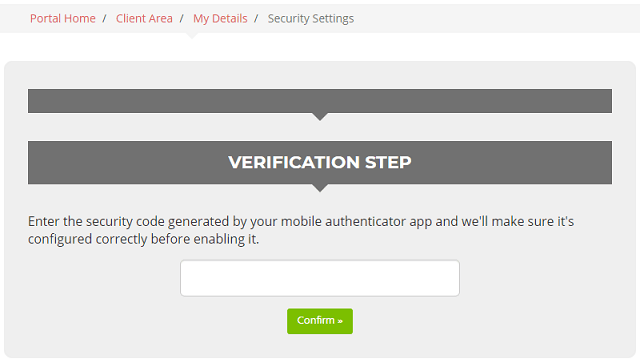
Once this is successfully completed, you will be presented with a page indicating you have successfully enabled two-factor authentication. This page will have your backup code listed on it. Store this code somewhere safe, in case you misplace your mobile device. You will need it to gain access to your account and set up 2FA again.
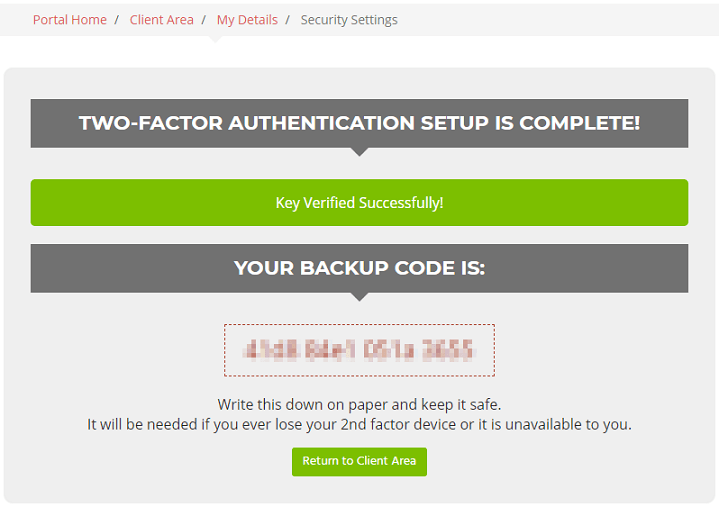
At this point, you are done. The next time you log in to the Client Area, and every time after this, you will be prompted for a security code after you enter your user ID and password. If you have any issues with this process, please don’t hesitate to open a support ticket and we will happily help you with the process.
